

This project is a solution to a constant problem I have had for years. Like many of us I have a computer in my home, well unlike most I have multiple computers and servers in my home and one thing that computers and hard drives do not like to do is have power polled from them while they are running.
Simply connecting a computer to the power outlet risks power outages (blackouts) or “brownouts” (Very short loss of power) from both causing loss of work and risking damaging the hard drives and data stored on the drives. For a server especially this is a huge potential risk.
The aim of this project is to build an Un-interuptable Power Supply (UPS) to maintain power when the grid power is lost.

I own several UPS’s already and they have all suffered from the same problem. They fail to work when you need them to!
The UPS’s I own are not cheap (well several are quite expensive brands) and while they work just fine, the issue is always the batteries. The batteries that are used are SLA or GMA “lead” batteries which tend to suffer from drying out after a year or 2 of sitting on charge constantly and while all my UPSs do a “battery test” they never raise an alarm the battery is dead and usually I know only when the power goes out and my servers either die immediately or before they can fully shutdown after power loss.
Replacing these batteries is not really all that cheap with quality deep cycle AGM batteries costing $50-80aud each with a UPS needing 2 of these to be replaced every 2 years.
Replacing the batteries simply with lithium wont work as the charging and battery sense circuits are not designed for lithium so I set about making my own single lithium battery backup supply I can run my server room and my main PC from.
I actually started research and design years ago on what it would take to upgrade my current UPS supplies. My server room and computers are all in the same room so a central UPS would be easy to make.
The first step was figuring out how much wattage I would need as this would then determine the battery and run times etc. I knew my server room needed about 300W to run my 2 servers, CCTV and data rack while my main PC needed about 250W. These are typical values as my main PC when gaming needs a lot more power but I simply estimated 500w for the server, 500w for my main PC with 2 additional 500w capacity for my second workstation and future needs.
So 2000W is how much power I needed to supply which now ment I needed a Lithium battery capable of about 200 Amps (at 12v)
One main difference between Lithium and Lead batteries is Lithium batteries typically incorporate a “Battery Management System” or BMS internally that manages the flow of power in and out of the battery which usually means they have a hard limit on how much power they can deliver constantly where a lead battery will deliver as much as it can physically but ultimately for a very short period which is why smaller batteries can be used in a UPS that only runs for 10 odd minutes.
a 200AH capable Lithium battery is quite large and while I do not need a UPS to run my system for hours, I do need it to deliver the 2000W I will need so it has to be a huge 200AH battery which means it needs a good chunk of space.
The battery will run an inverter that has “Automatic AC power switching” meaning you connect your AC power into the UPS and it passes that through to your gear but instantly switches over to battery if AC power is lost.
I researched some options, got the approx sizes of these devices and sketched out a rough idea of the size of this unit so I could check it woulda ctually fit in the location I had available.

As far as projects go this one was actually pretty easy since it was just really choosing the right parts for the purpose and connecting things together in a box but what I like to do is split a project up into the main categories to manage and this project had 4 main sections to it:

1. BATTERY
The battery needed to be able to supply a constant 200AH so I chose a Kings 200AH Battery which here in Australia, these are available from a 4WD wholesale store with frequent discounts so I simply waited until these were being sold at a good price which did not take long, $420aud when purchased with a torch as a bundle (otherwise $699 usually). They constantly have bundled sales to get you looking through their offerings.
Now this is a huge battery, I have the same one in the back of my 4WD which runs everything when camping and it has been a super reliable and easy to maintain battery for years, provides ample power to everything and for the cost is hard to beat.
It incorporates a rather sophisticated BMS which manages all the charging allowing basically any voltage to charge it, cuts off charging when the battery is full, protects from overload, short circuit and heat overload automatically so it solves many problems in one device.

2. Inverter / UPS
The inverter was a little more specialised as it needed to act as a UPS allowing power to switch immediately to battery if AC was lost. I did consider making my own relay switched system that could simply throw a contact when AC was lost from AC to Battery however there are a few problems if not done correctly.
First is using a mechanical relay can take some extra time to switch which may still be fast enough to avoid a drop out but can also create problems switching from AC to Inverter power where the phase of the AC wave is not in sync between AC and Inverter. There would also be considerable arching in the relay and some inverters simply do not like a large load being dropped onto them immediately.
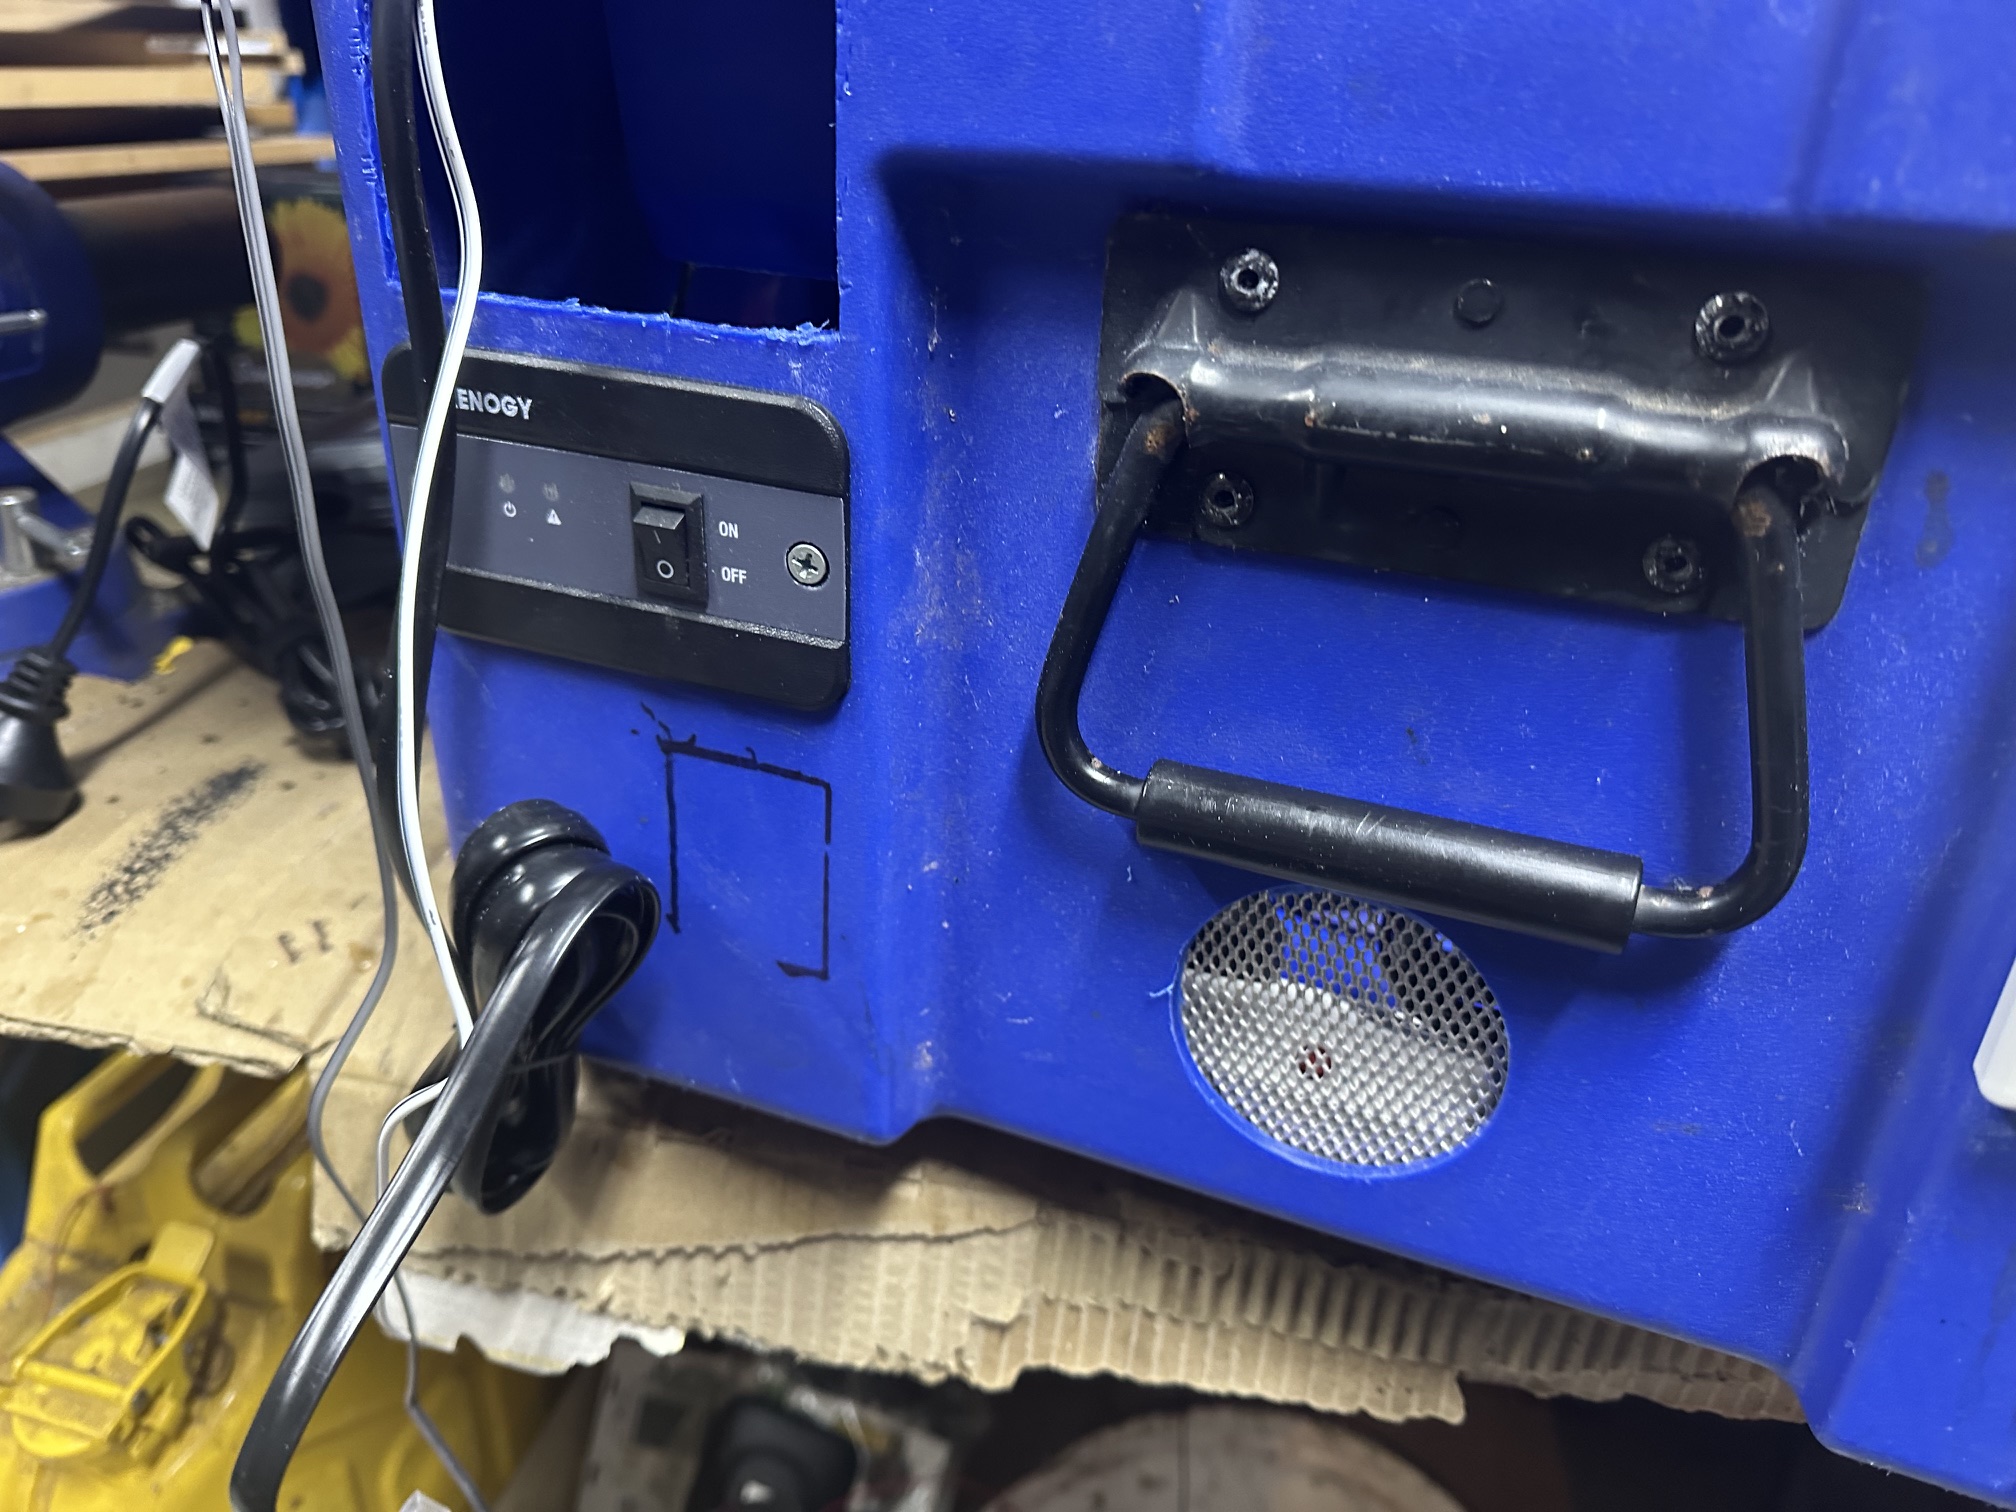
I wanted this to be not just reliable but safe to operate so I chose an inverter specifically designed for this kind of task, Renogy 2000w Inverter with UPS Function
This UPS was available at my local Supercheap Auto supply store and just happened to also be on sale for $300 with some extra store credit I already had.
The main feature of this UPS is the fact you can connect 240vAC directly into the inverter which is supplied to the outputs but will automatically switch to battery when AC is lost which is the whole point of this project so again, this one device makes simple work of the whole project.

3. Battery Charger
The battery needs to be charged when connected to AC and there are a few things to consider here…
I did research inverters that had both UPS and battery charge functionality but these were more specialised usually for RV installations so had solar and power inputs and costs running into the thousands. I figured I simply needed a 10 Amp lithium battery charger which would supply 100W of charge to the battery which isn’t the fastest charging but this is designed to supply backup power and can then sit and slowly charge for days if need be and slower charging is less heat and stress on the battery.
While there are quite a few charger options available one thing that was difficult to find the information on, even when asking in store is many of these chargers have multiple modes you can select to charge AGM, Lead, Lithium, dead batteries etc. I have a few multi-function chargers and an issue I was aware of is the chargers I have all have to be either activated after connection using a button or the mode has to be changed to the correct mode when connected.
I ended up selecting a Hardkorr 10 Amp Lithium Battery Charger which was also on special at my Supacheap store since I was able to download the manual which actually stated the charger would remember the last operational mode and automatically select it and charge when power was supplied and would also switch automatically from charge to maintenance mode when the battery was full. This is exactly what I needed as this would be connected to the battery to charge after power is restored then simply maintain charge once running.

4. Housing, Connections & Meters
The last part of the project to manage was the actual housing, mounting of the gear, cables and the external meters and connections.
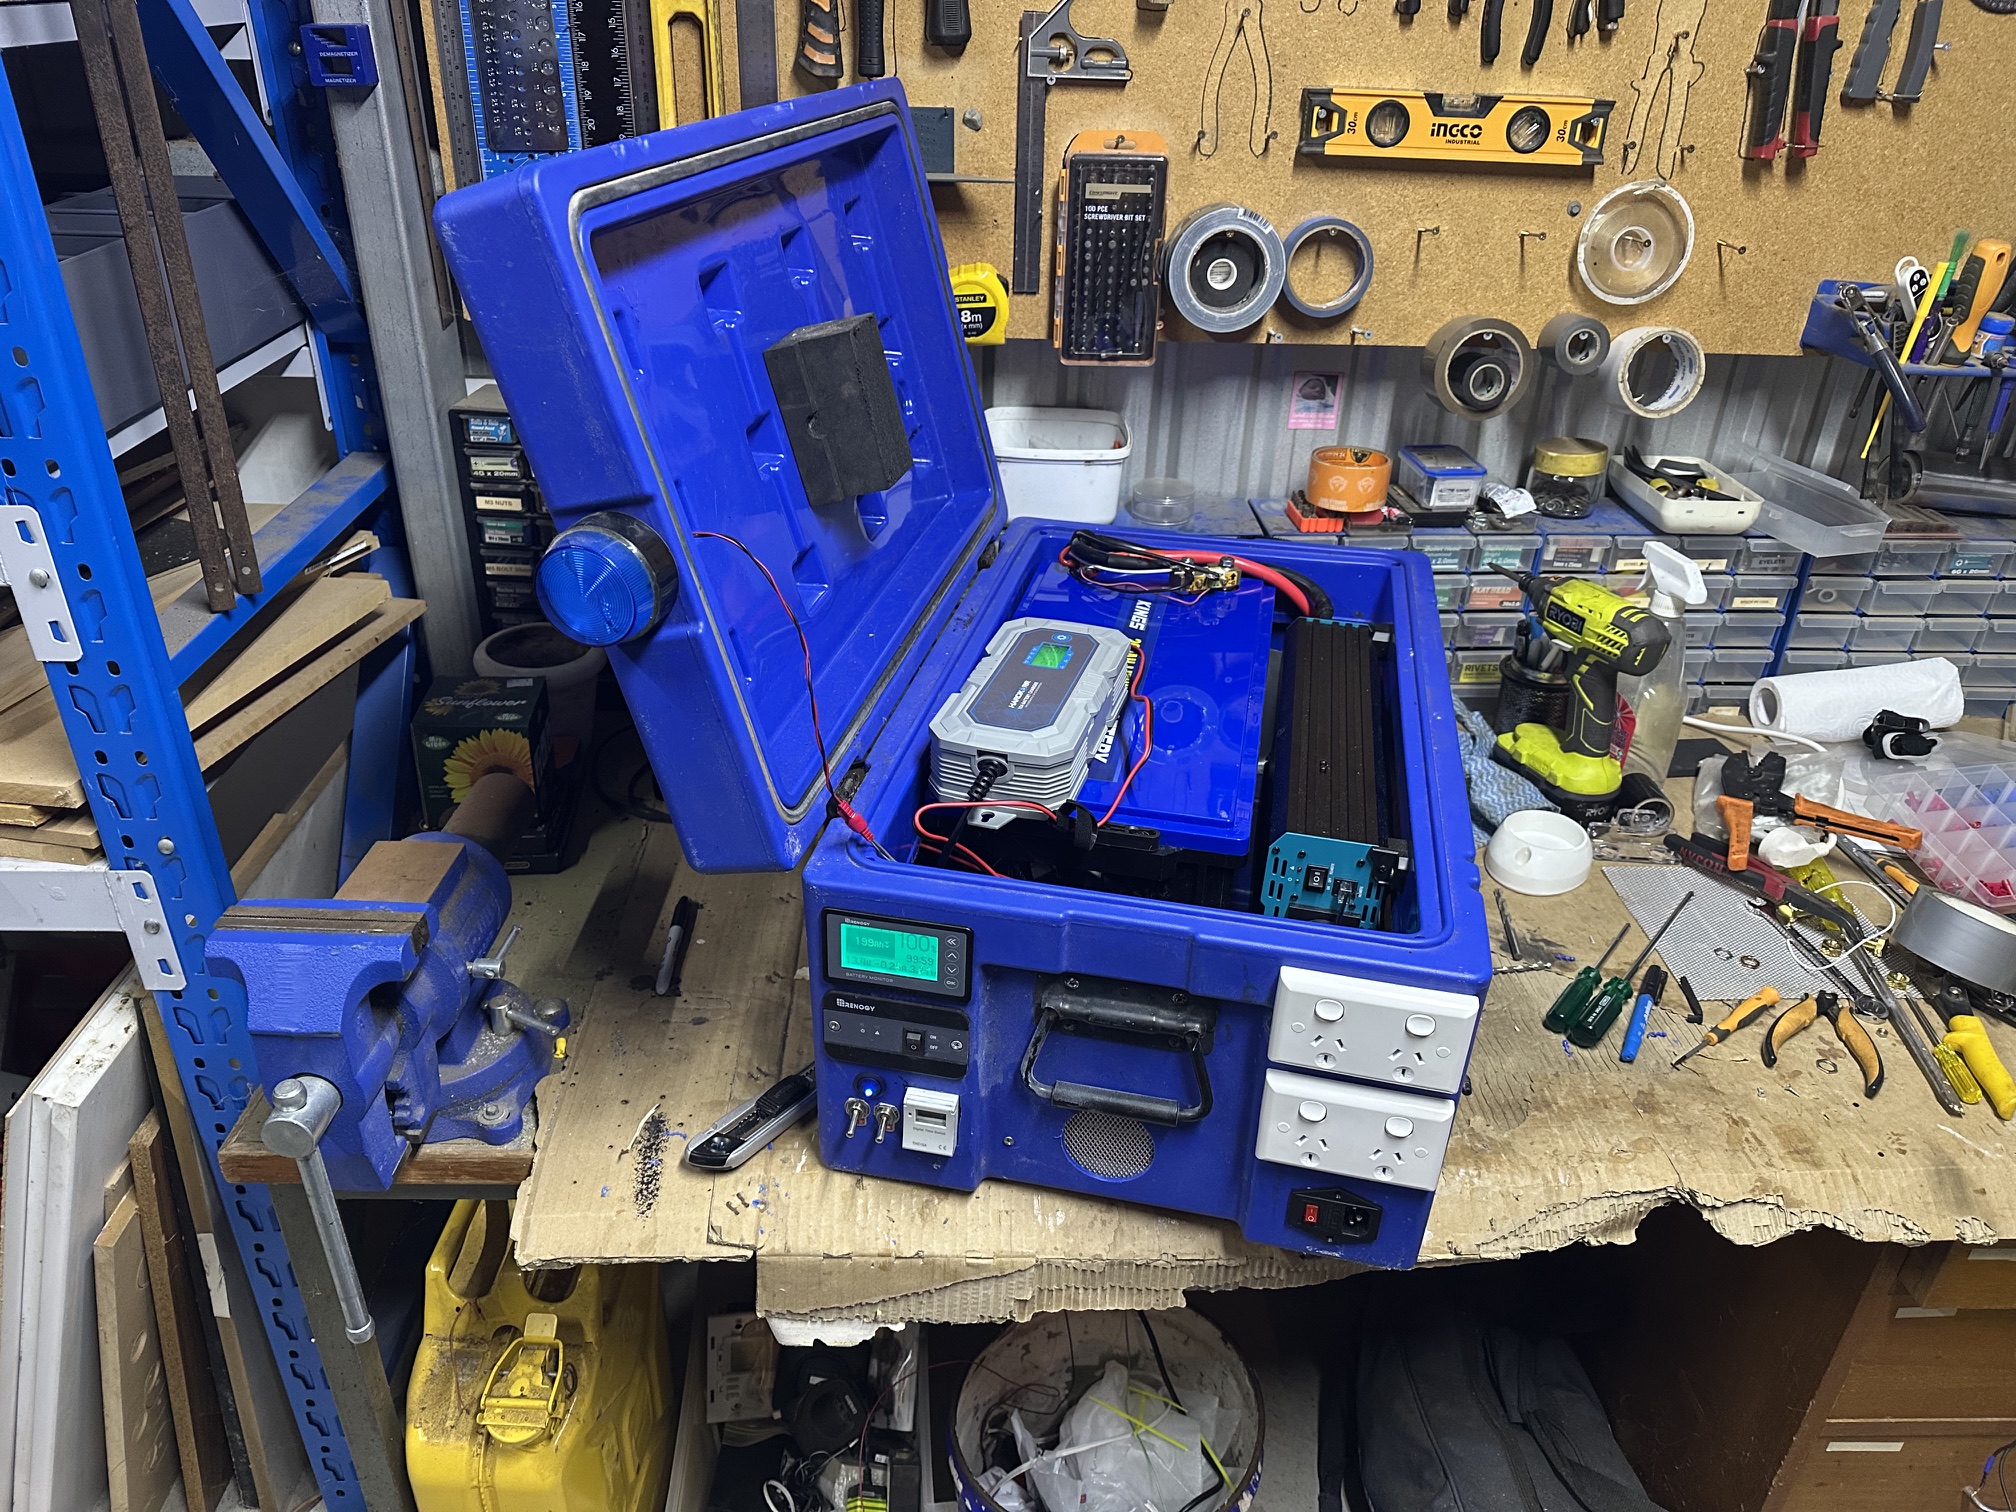
This actually is where I spent most of my time contemplating the best way to house it all. While it seems a no brainer from the pictured image, the box I chose to use does fit things perfectly however does have a lot of wasted space due to a large internal lip and thick insulated lid resulting in a box much larger than what I measured things to be.
I could have built a wooden box specifically to the required dimensions which is what I planned to do however the extra time and effort needed when I had this box already sitting in my camping gear (it was used to store firewood for camping) I decided to just use it after measuring it would actually fit.
The box also comes from the Kings 4WD store and is about $100 so is quite cost effective and sturdy to hold everything together nicely.
The additional parts I needed were some high current battery connection cables which while I have the cable and lugs to make my own I decided to just purchase pre-terminated 40cm 200amp Battery Cables from Jaycar Electronics for $25 each.
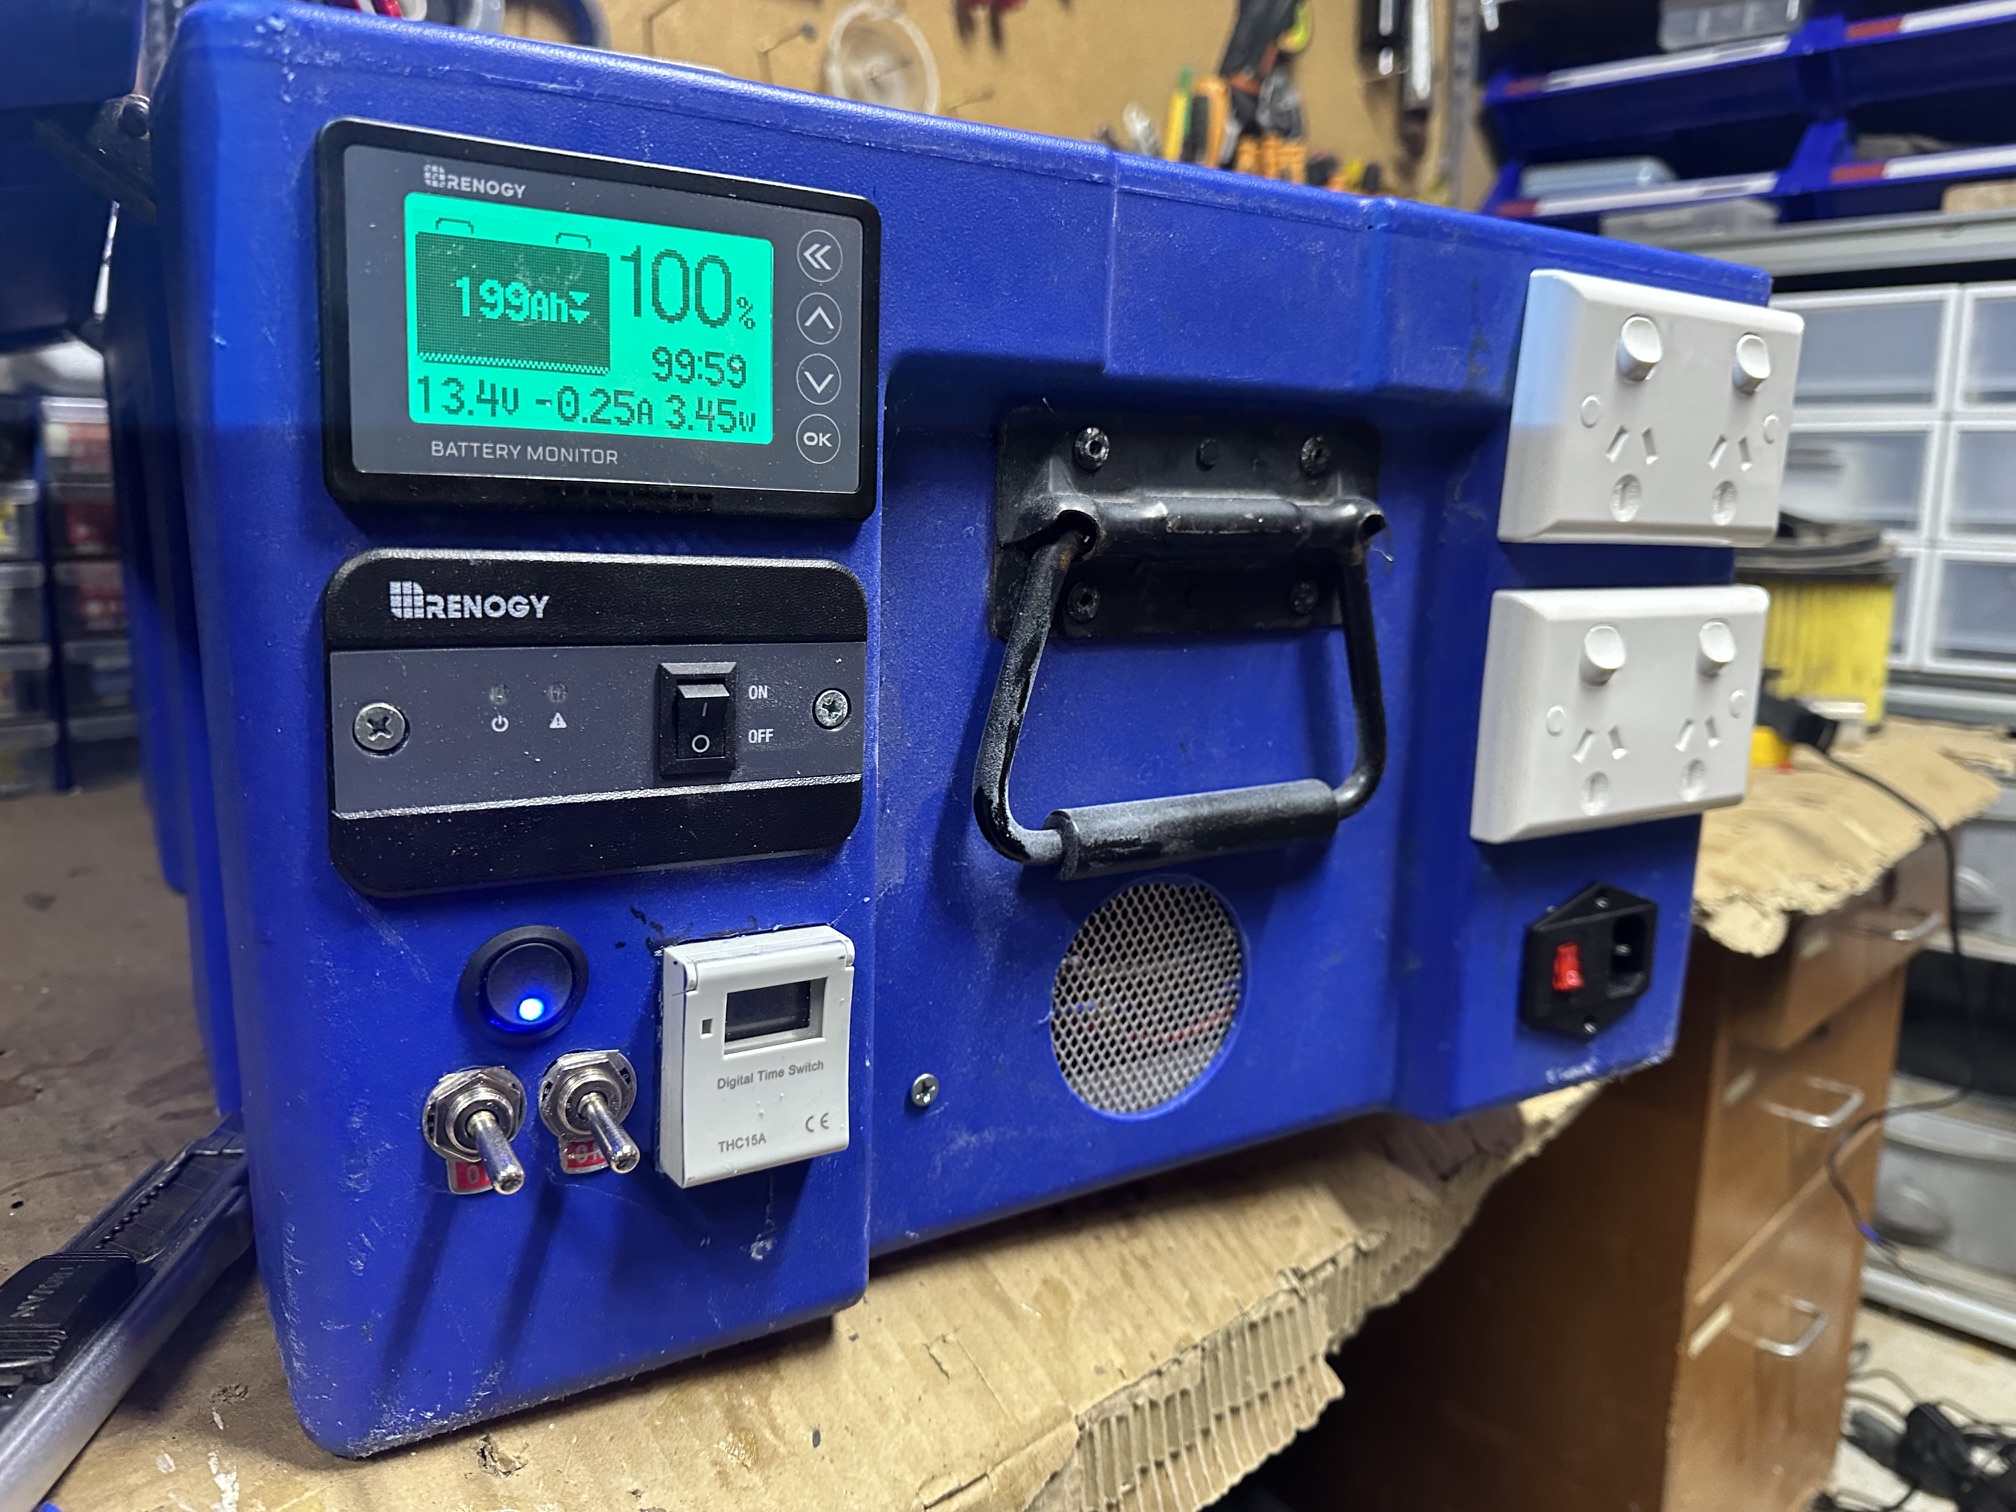
I then also needed a power meter that shows the current capacity and power draw of the system. I already had one of these in my shed but I use the same one in my 4WD which is a Renogy Power Meter with Shunt which you can also find the same kind of meter via Ebay for a little less but it tracks power out/into the battery and offers a very accurate battery level along with approx runtime, current and power draw readout and a low battery alarm.
Last part of the whole build that was needed was simply the power points and input power connection which I have spares always but these are available from hardware and electronics stores.
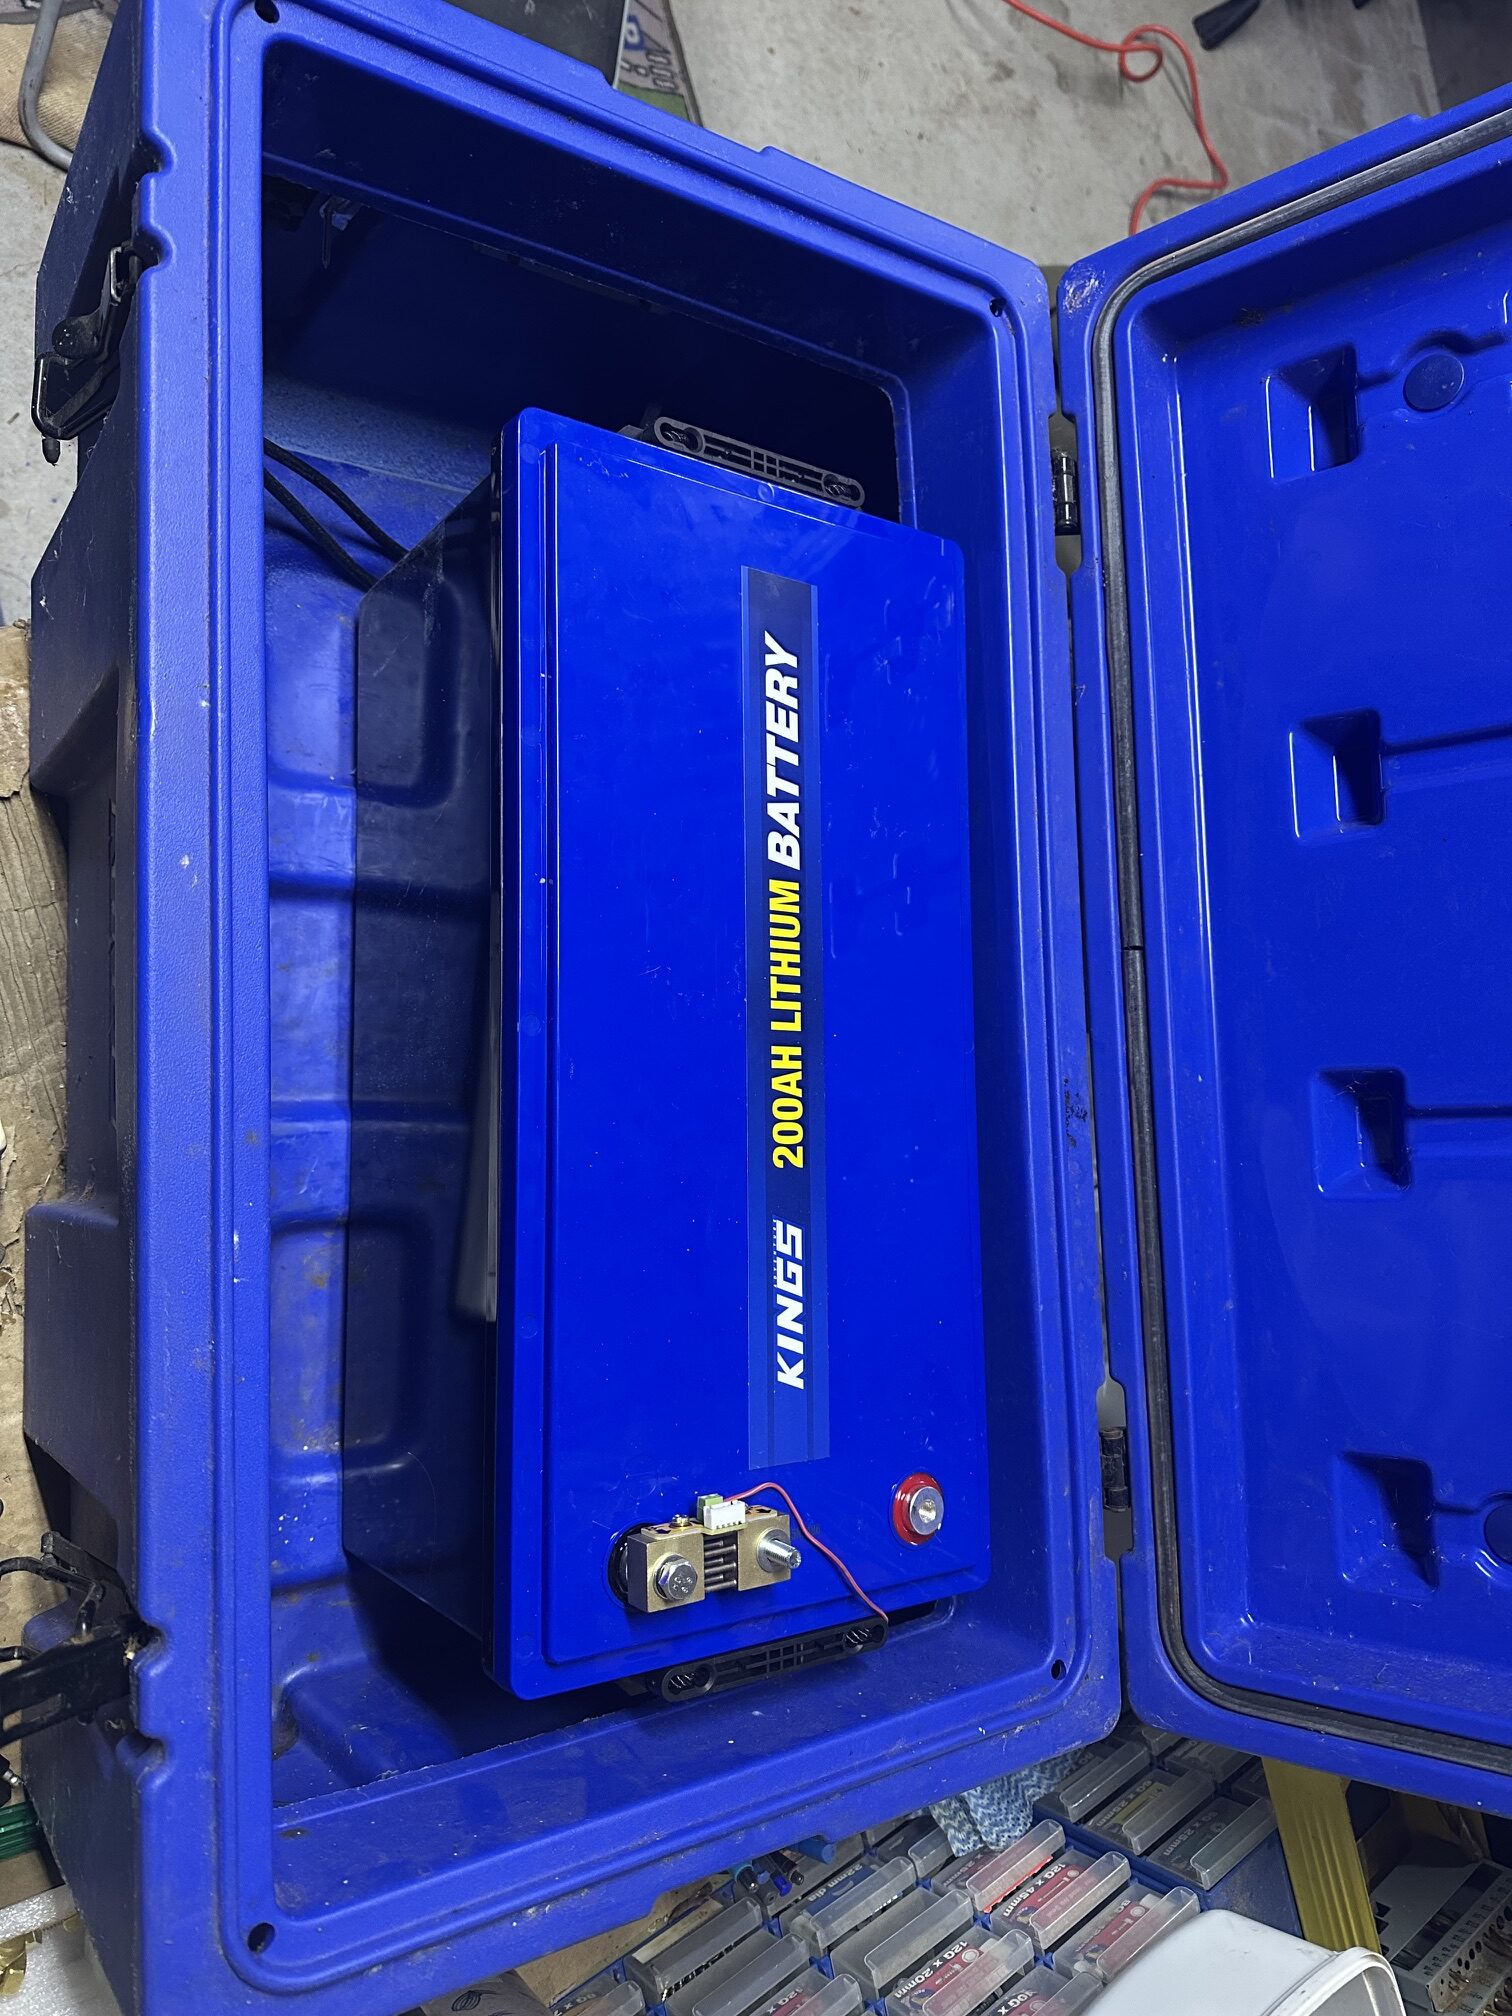


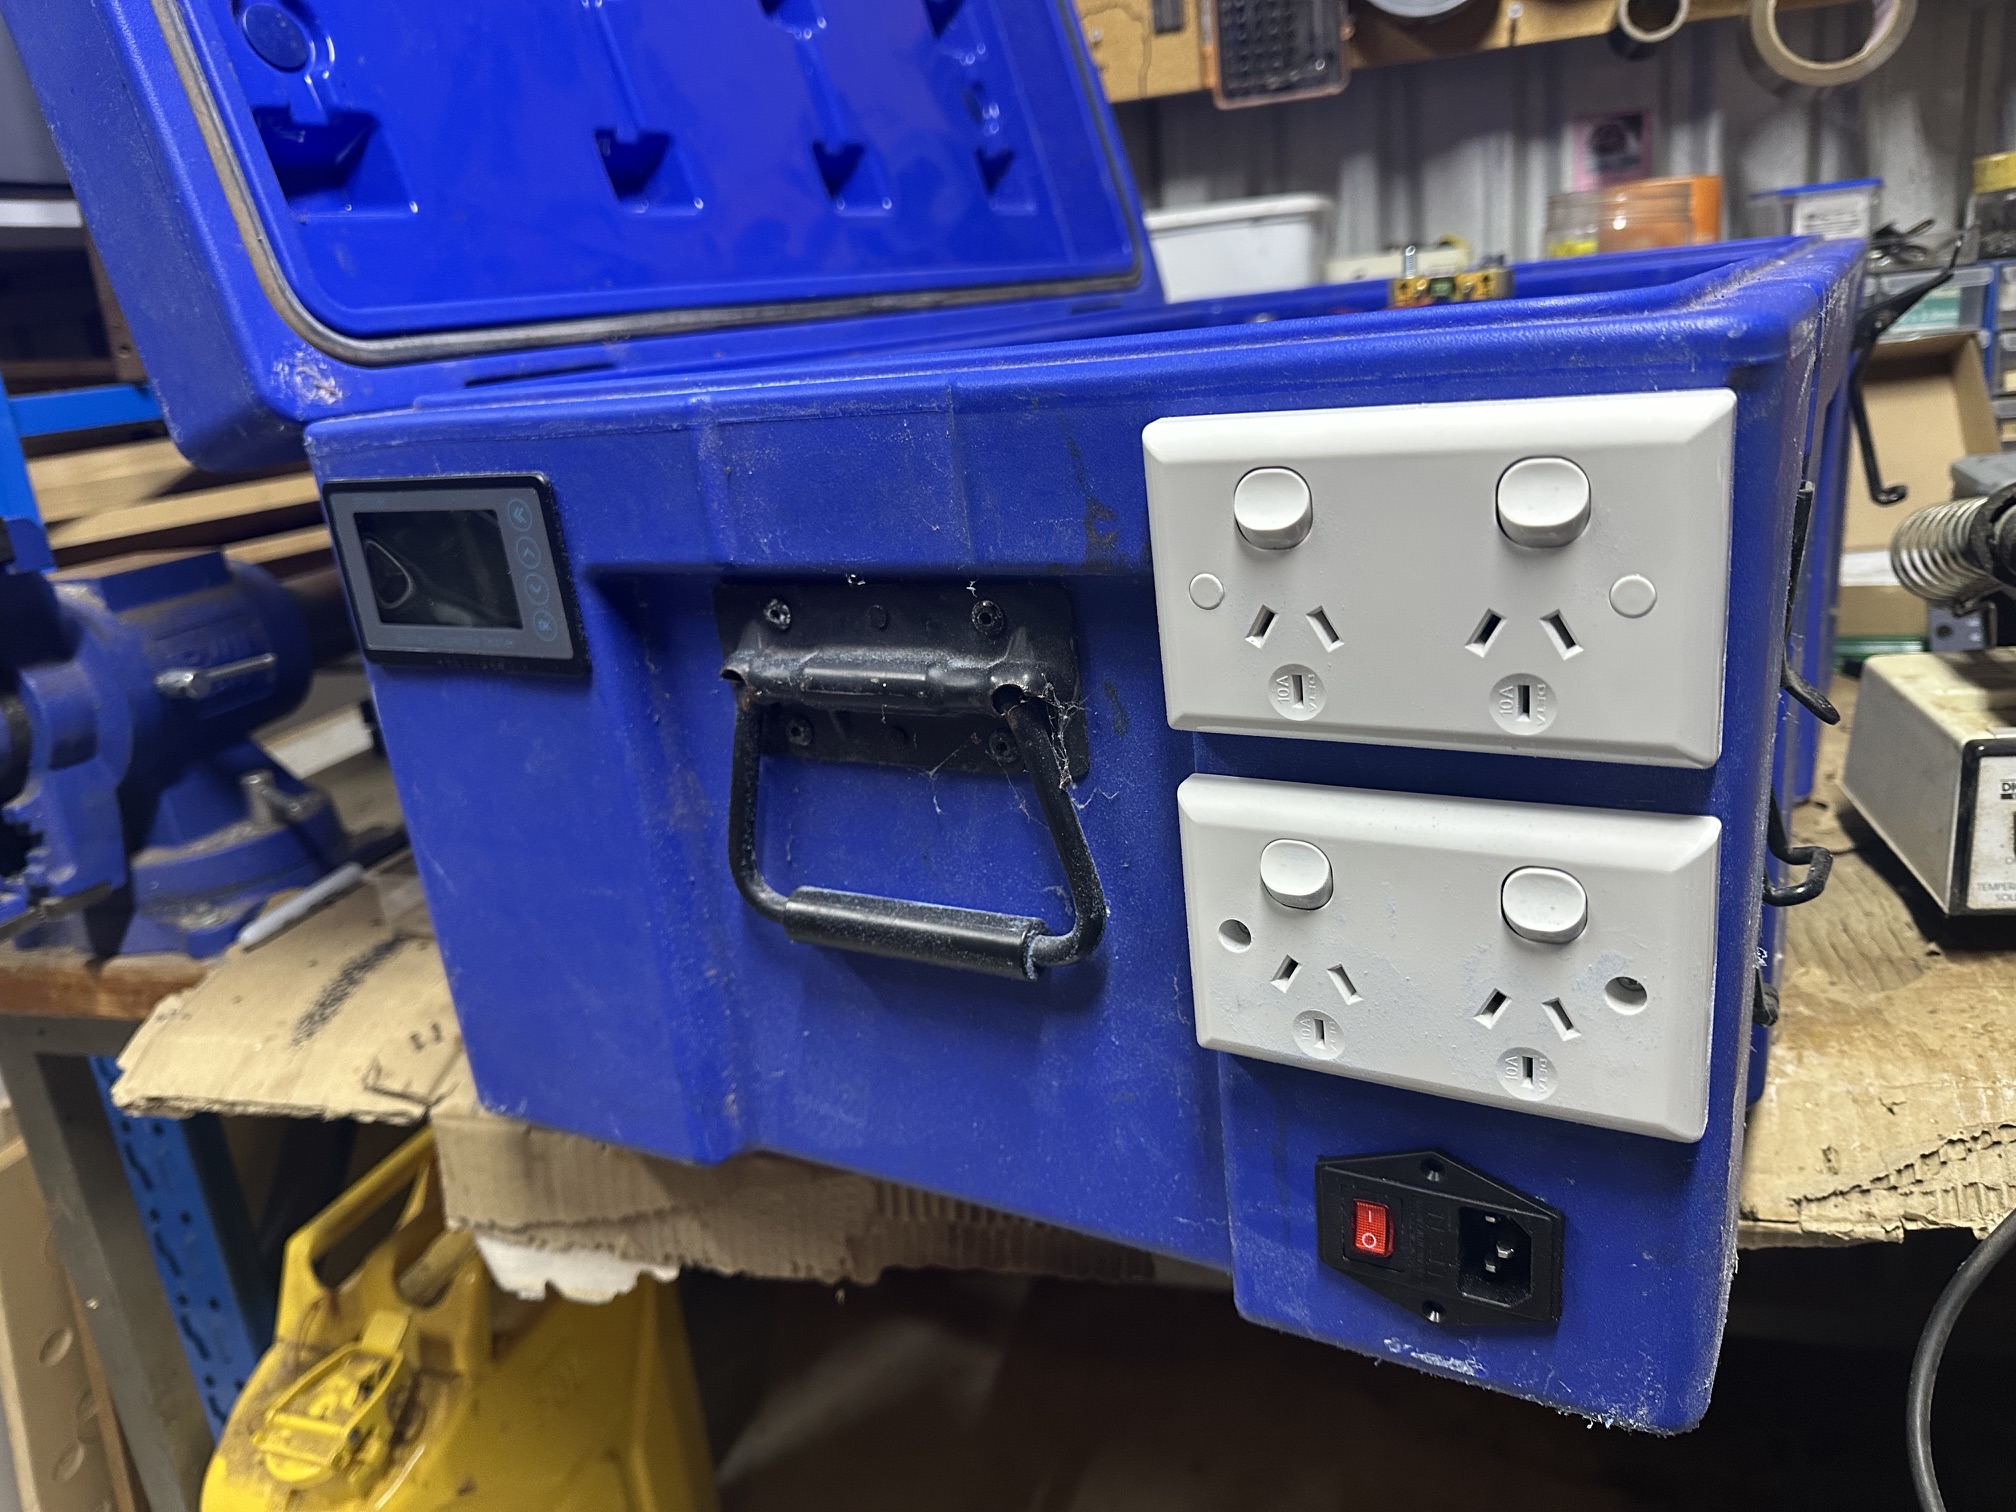
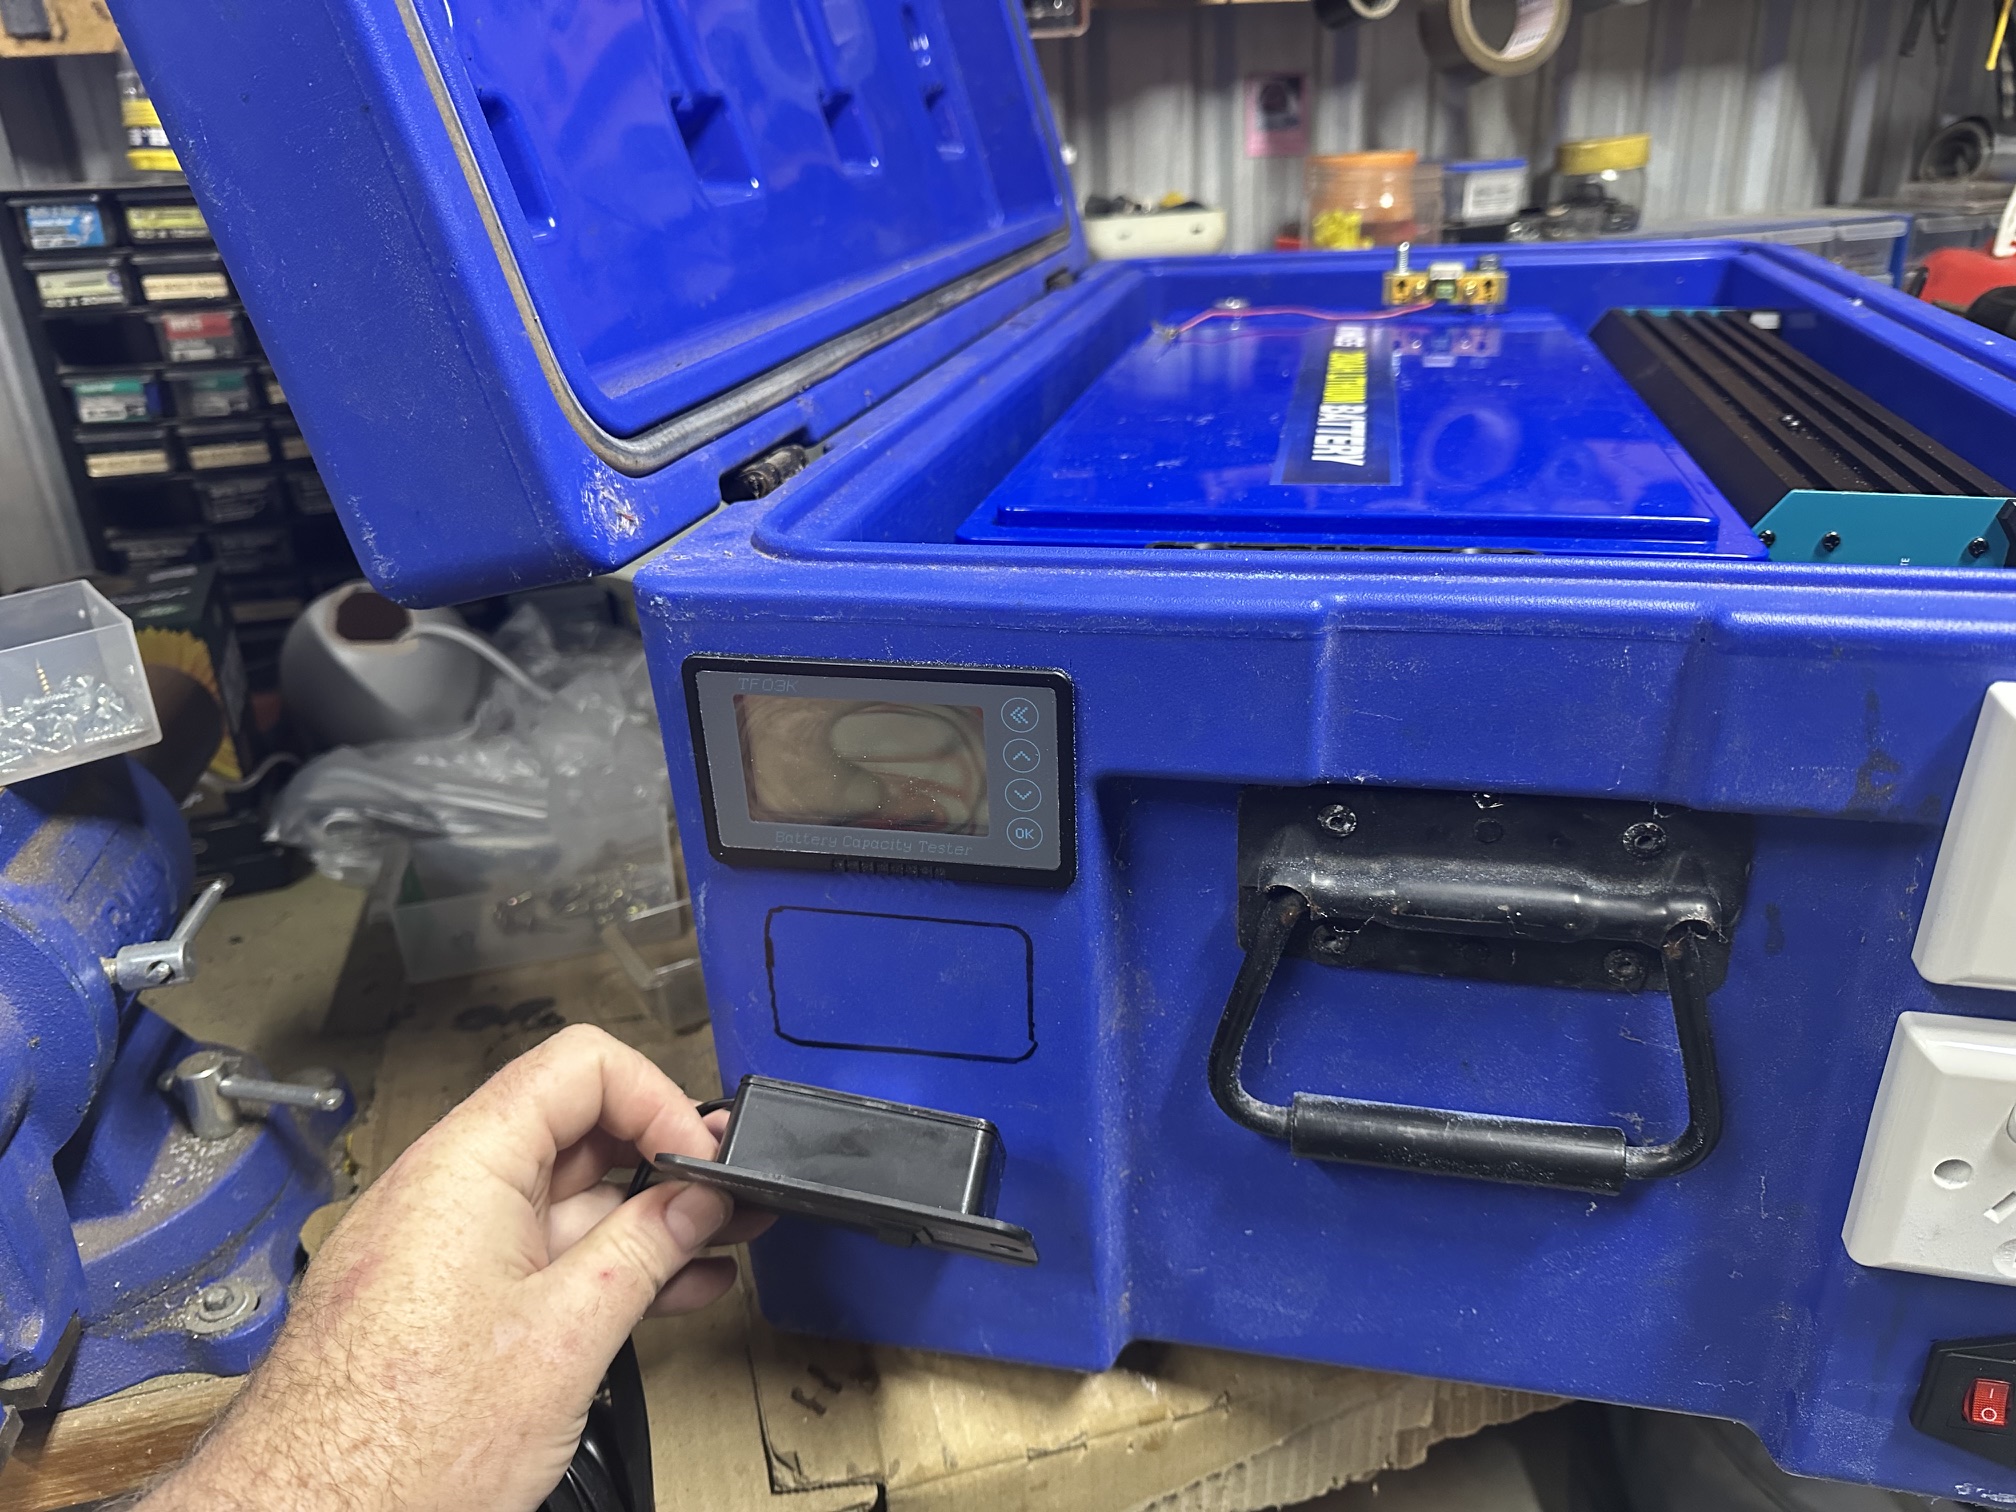

This whole project was done in a weekend with Saturday running around getting the parts and Sunday putting it together. It took about 4 hours to build it completely and was in service the following day.
I first figured out where each of the pieces was going to fit in the housing, making sure the inverter was secured in with screws and a wood rail on the lower part of the housing (due to the internal lip being quite large) then using dense foam blocks between the inverter and battery to keep the battery set to the side.
I used a Dremel to cut out the holes for the power sockets, meter and UPS switch plate then soldered up connections to plug things into the inverter.
A fused IEC power socket input with illuminated switch allows power to be plugged into the unit and internally this is wired to a power board that connects into the UPS and the charger.
The UPS protects from overload, short circuit, over temperature etc and the whole system is protected from a 10 amp glass fuse on the input so all the protections you would expect are incorporated.
Everything is fully automatic. Just connect power and it will charge/maintain the battery. Connect your devices and they are powered from AC, if AC is lost the battery simply takes over without a single hiccup. In fact you would not even know AC is lost unless the battery runs low after 6 hours or so.


As projects go this was quite an easy one to design and build as it was basically just taking an inverter, charger and battery and throwing it into a box although be it with a little attention to detail.
It solves the exact problem I had for under $1000 and now allows me to get rid of 3 other UPS’s I had connected, one of which (the cheapest one) seemed in danger of catching fire as internally it was very heat affected and melting parts internally.
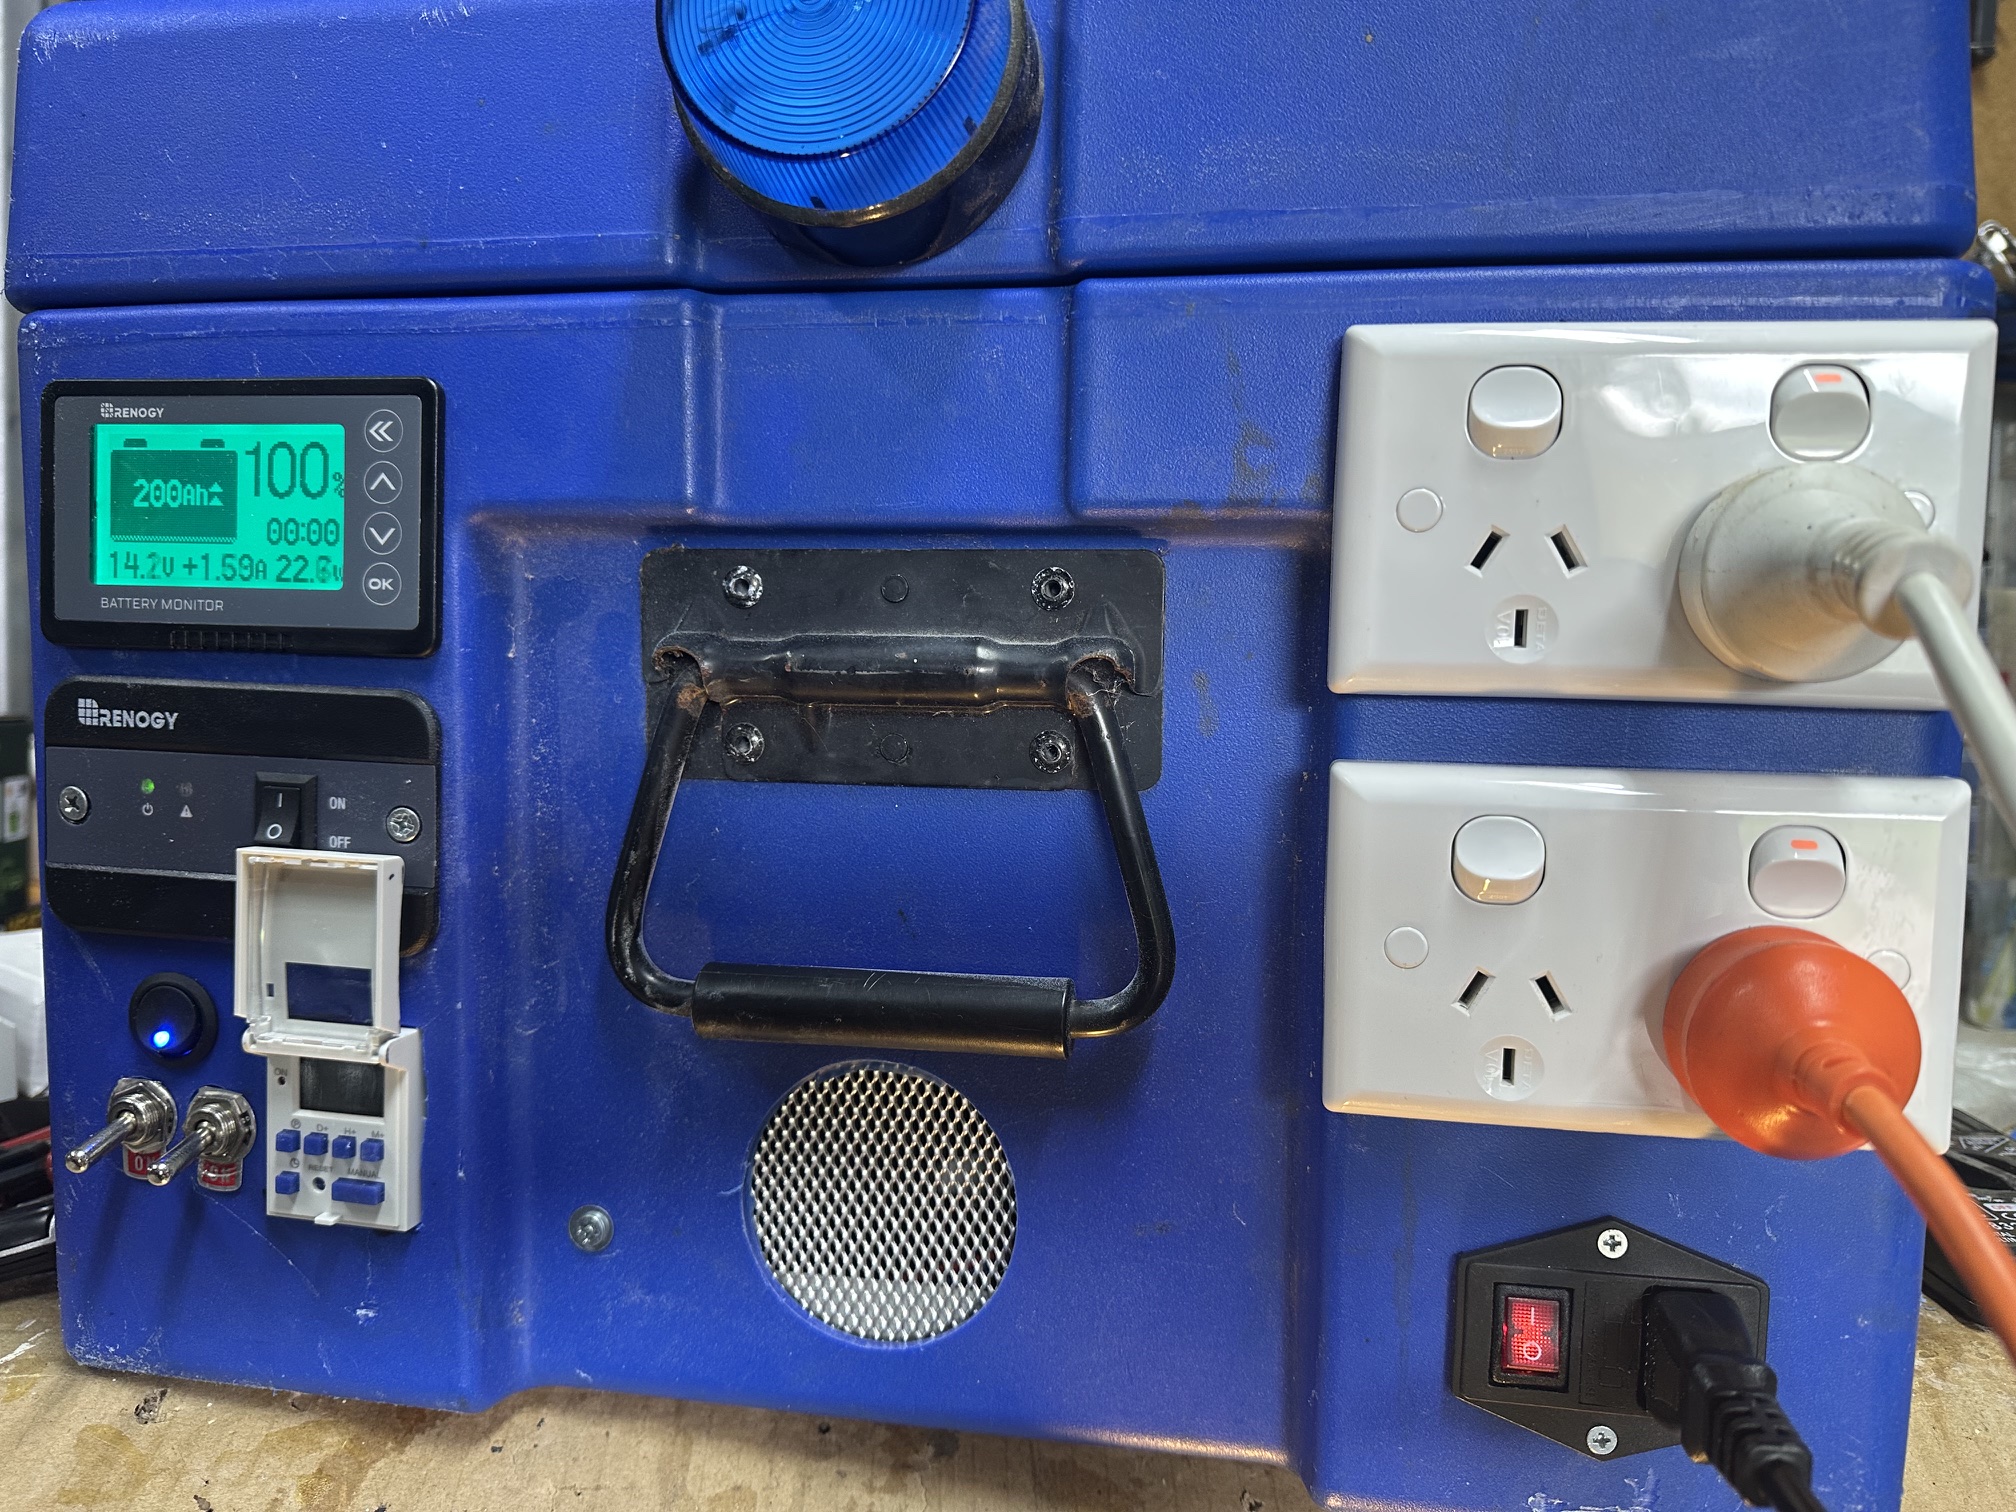
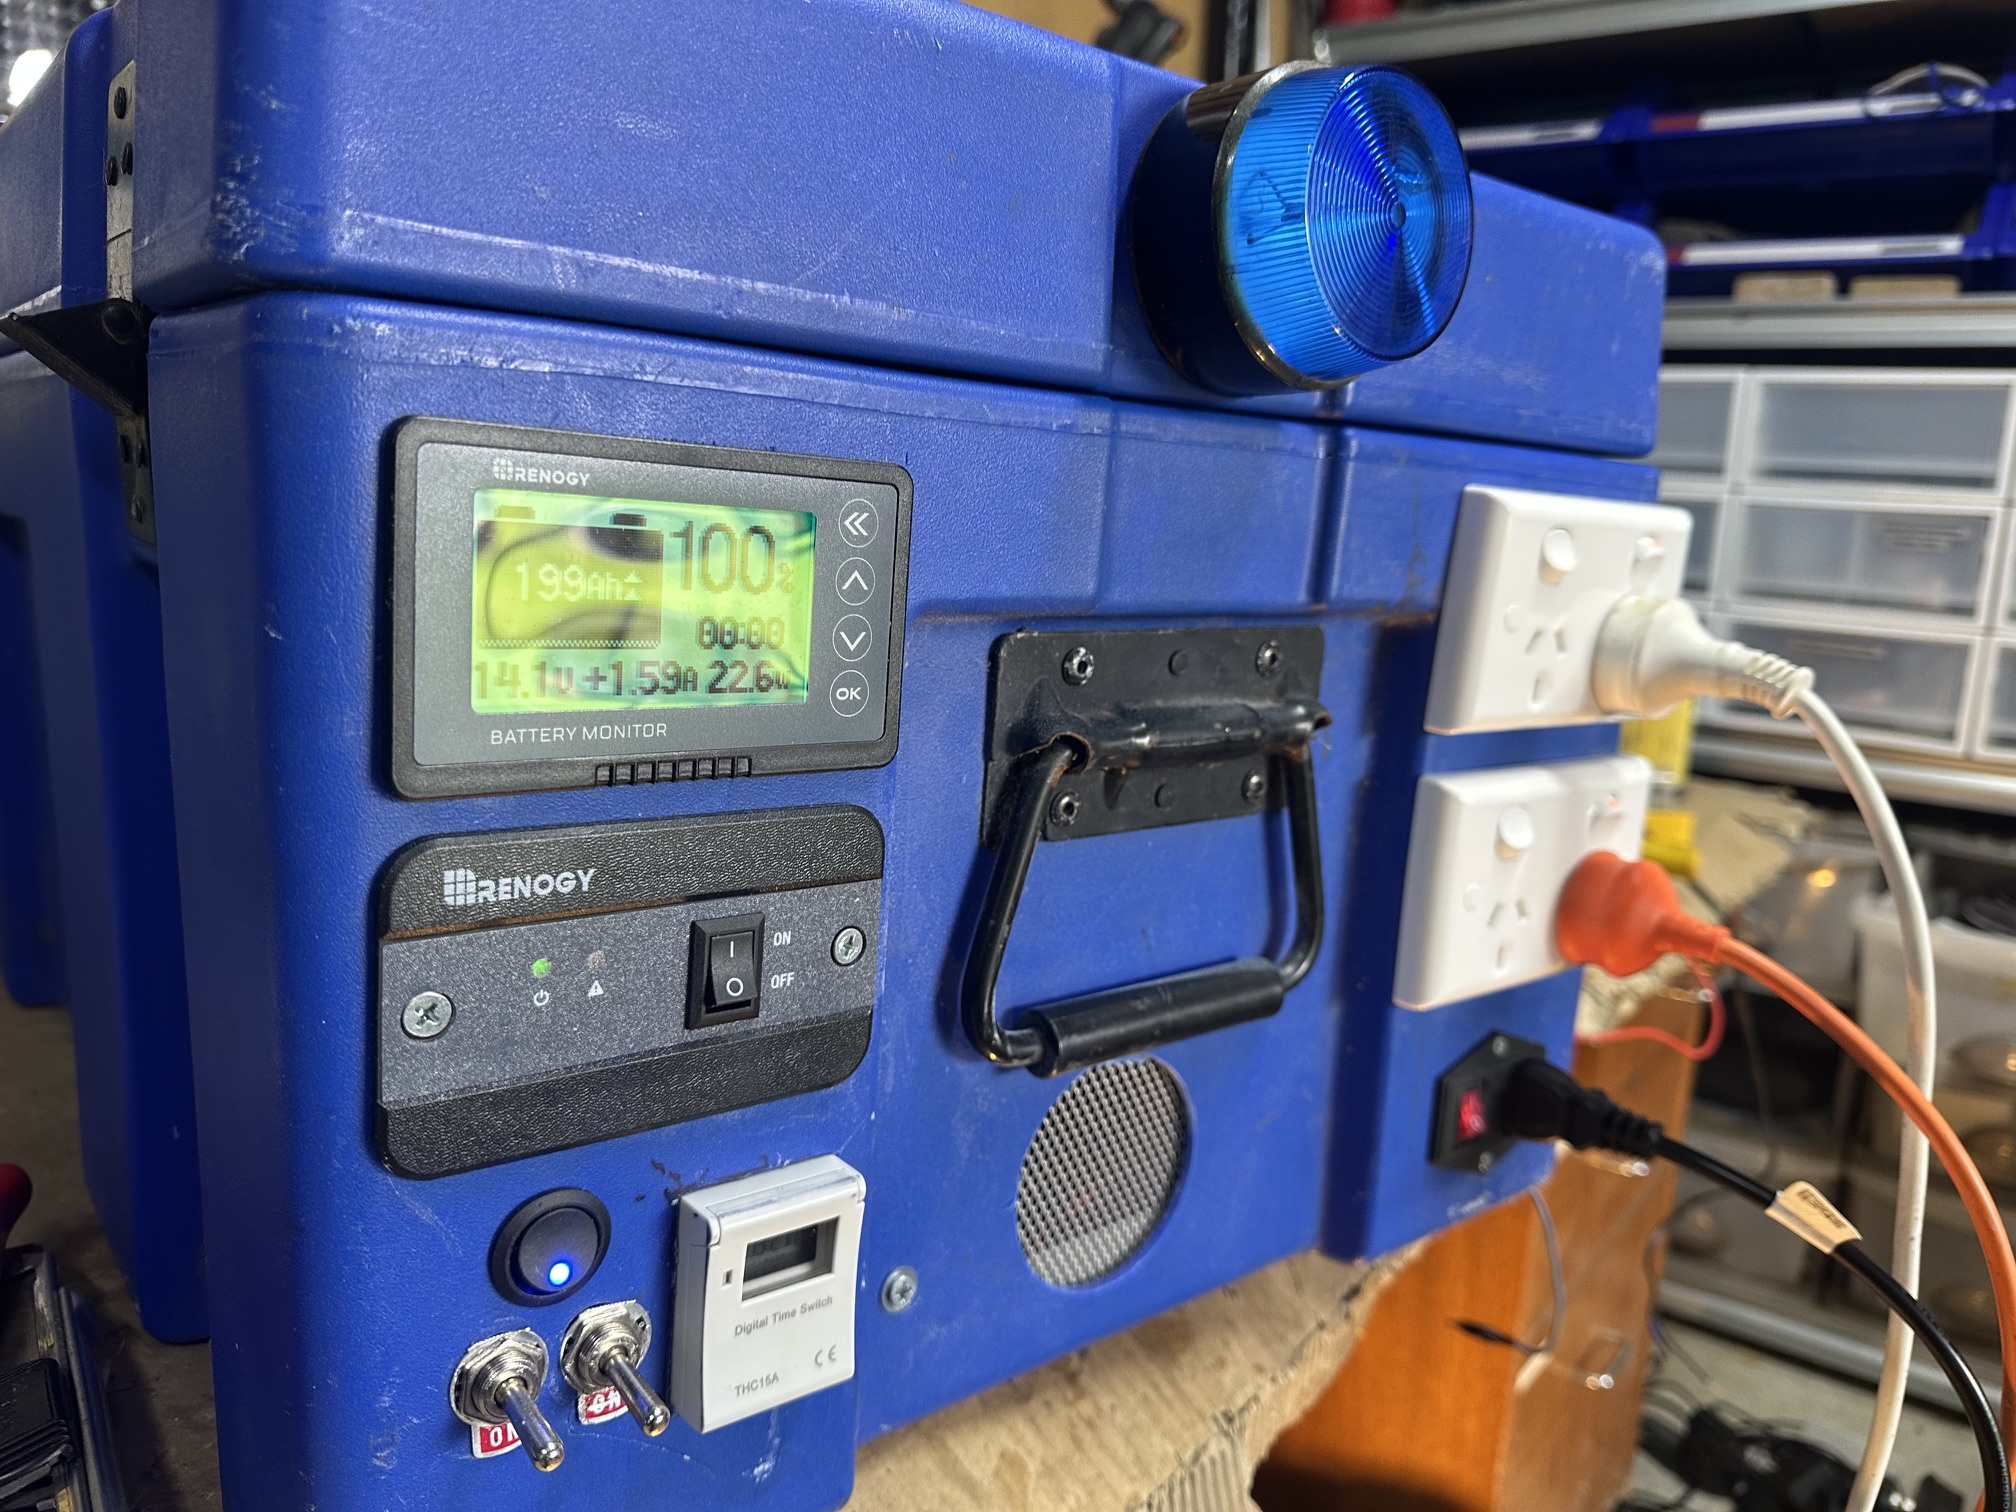
Obviously time will tell but battery wise I have a lot of faith as these batteries are widely used and I have had one doing a lot of work in my 4WD for years without a single issue. A bonus with this system is it is not just a short term backup supply, it can operate for hours in a blackout so can run other important gear such as lights or a TV so it is much more useful than my other expensive UPSs. In the above images you can see one image shows the meter in “standby” mode where just 1.9W is being drawn from the battery which is the UPS standby function and you can see the AC Input switch is ON. In the next image you can see the AC Input switch is OFF and the power draw from the battery is 533W with a runtime of 45 hours 10 minutes!
While my initial aim was to keep this build simple, functional and reliable for the first stage to test it would actually work I do have plans to modify this for the future. A few plans I have is to incorporate a solar charge circuit so I can connect a few panels on the roof to maintain and charge the battery instead of the AC charger just for renewability sake. My house is already running from solar and battery power however the battery backup does not power the whole house in a power outage, only a single circuit for the kitchen to keep fridges running and the lights however the battery is not always guaranteed to be charges such as winter especially during the night. I also plan to add additional connections for 12v via Anderson and cigaret lighter sockets as well as some automated lights that come on when AC power is lost along with maybe an optional buzzer (with override) so I can be warned when power is lost.
I also want to incorporate an automatic daily battery test feature using a timer that simply drops AC power for maybe 10 minutes allowing the unit to run off battery power or when summer hits, have the system run the server from battery overnight to save on the home solar battery then reconnect in the morning to charge. This would keep the battery in a working state and also test it will run with an optional low battery alarm able to detect if voltage drops too fast.
I have also considered the need for some cooling fans. I have air intake ports at each end of the housing to allow air flow and the inverter has cooling fans, very minimal heat is generated at all when not powered from battery and only notable heat is generated when powering more than 1000w which is not too much of a concern but some optional fans may be a good idea too.
Overall I am happy with how it all works, the cost of the parts and the quality of the build. Another project without needing to resort to AI to solve any problems for me, a big reason I enjoy taking on these kinds of things it keeps you actively thinking about solutions.
So after testing the UPS for the last month it has worked perfectly and has actually already done its job during a very short 30 second power outage maintaining all servers and computers without issue.
I decided to upgrade the features so that I could get this mostly off the list of things to do before I completely forget to do it.
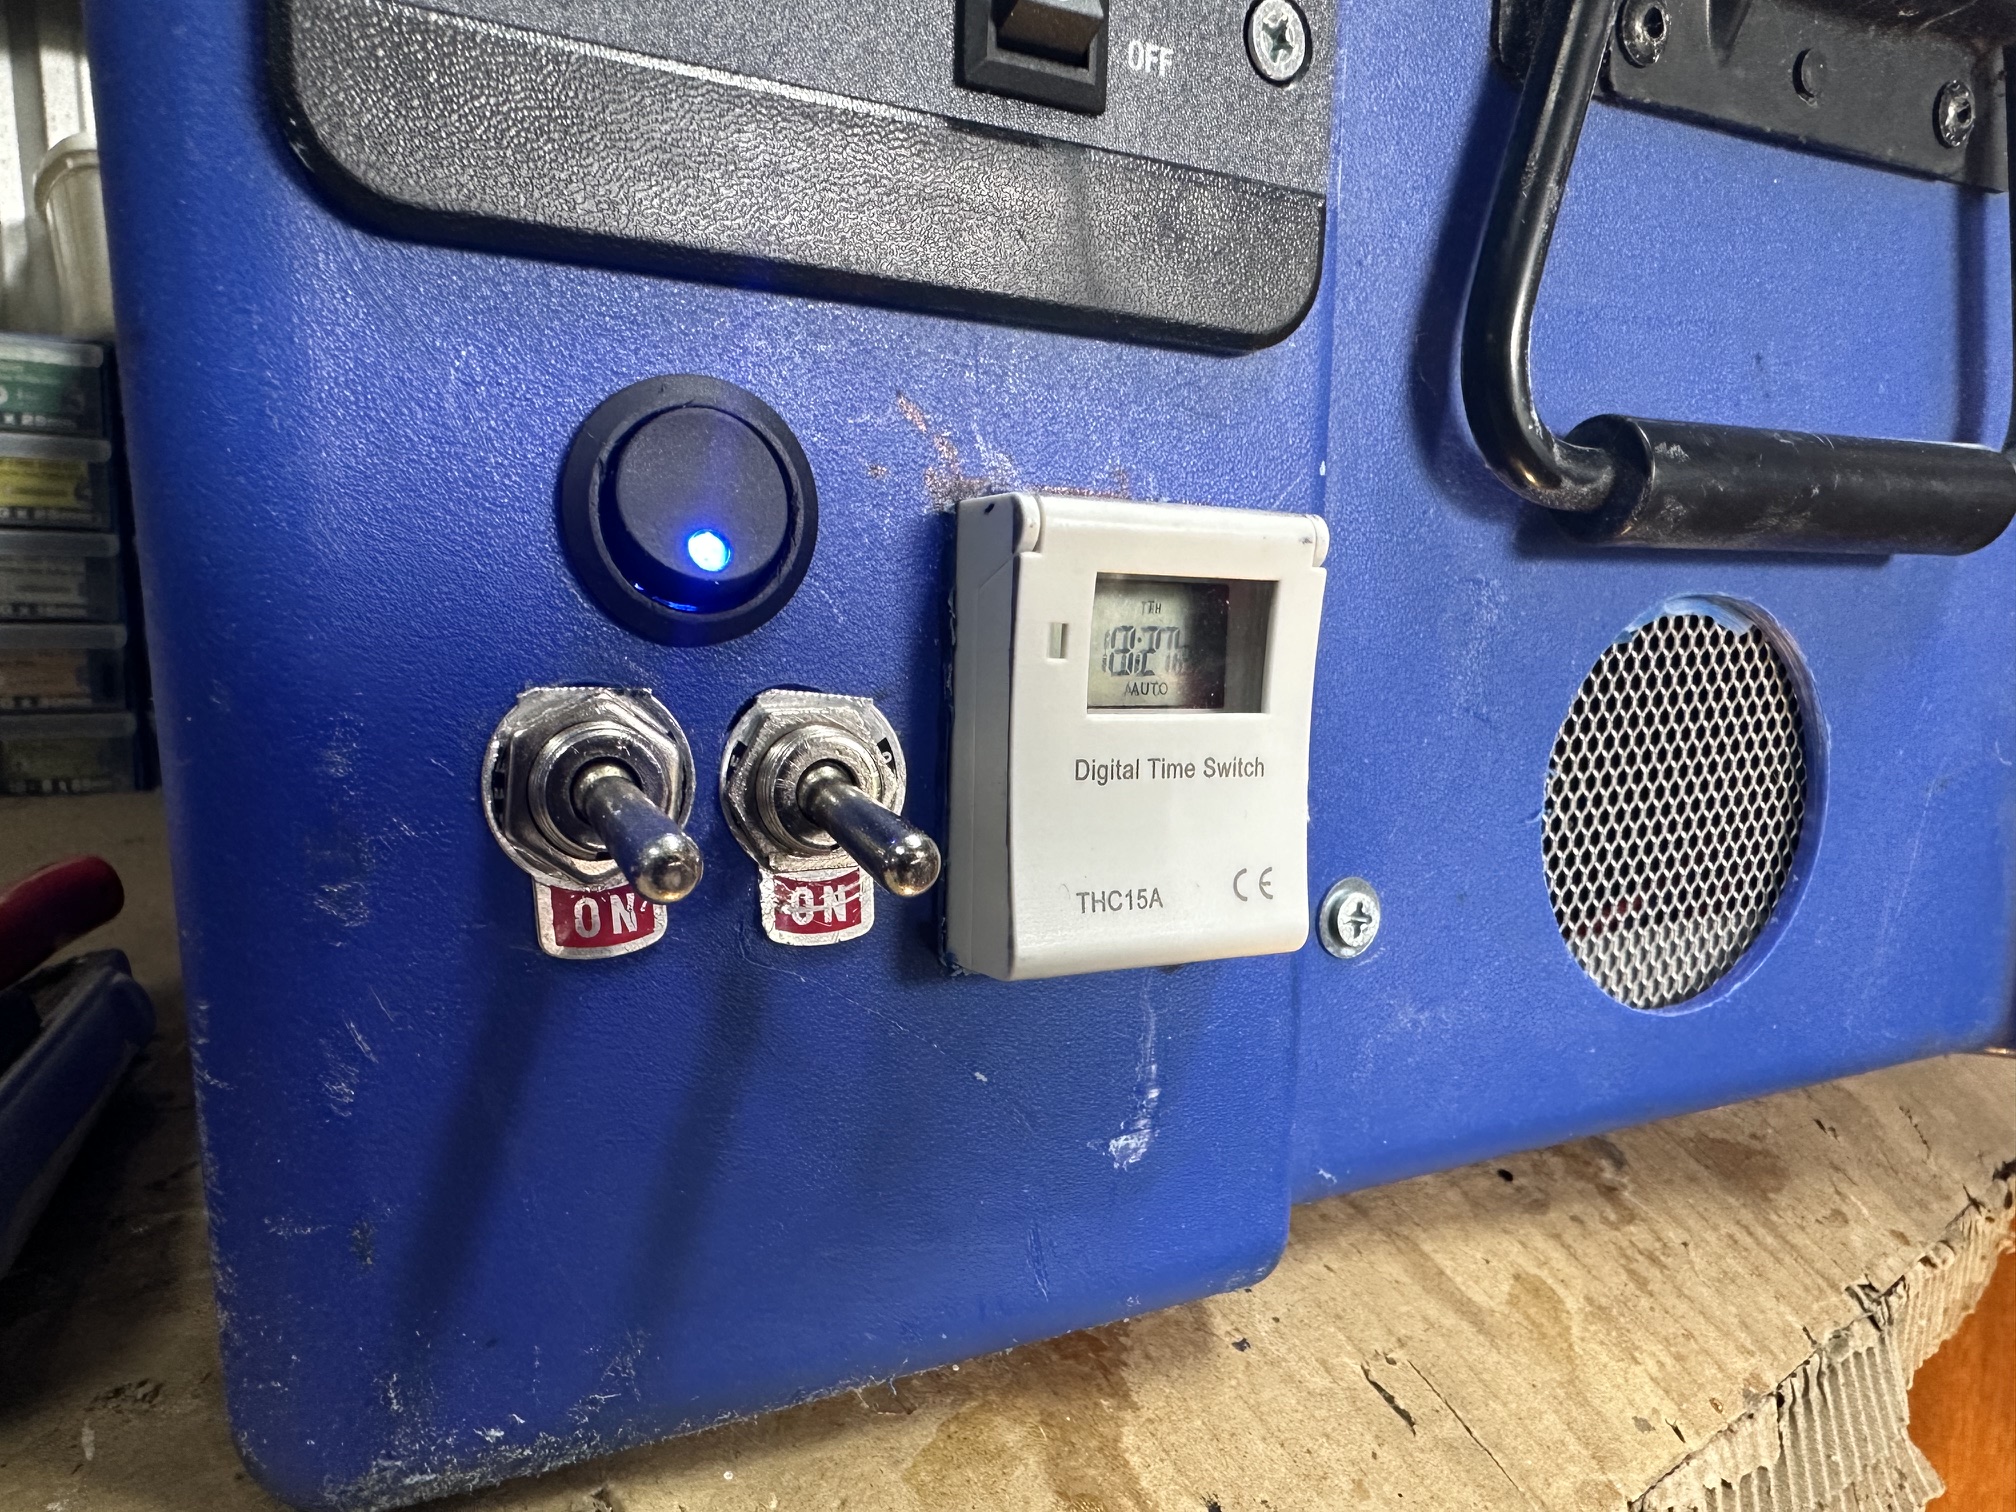
The main features I wanted to include were a test timer that I could program to drop AC power and switch over to battery in order to both test the battery and also force it to discharge a little to keep it active. To do this I installed a timer switch which I can program to activate any day of the week and switch to battery for a specific time. I figure 30 minutes to 1 hour is a good test and this will both test the system and discharge some of the battery.
I also wanted to include a warning buzzer and strobe light when AC power is lost so there is some visual and audible indicator that power is lost from the UPS.
Lastly I figured while I had it all open I would fit a cooling fan to one end just to move some of the air through but this only becomes active when running on battery to help cool the inverter.

I designed a quick schematic of the new upgraded system as I needed to allow the timer switch to switch over to battery for testing without activating the AC Power loss alarm I was going to implement. I also needed to detect when AC was lost and switch on the strobe and buzzer.
I considered using a 240v AC powered relay to switch the battery power to the strobe/buzzer bot I did not have one on hand however, I had plenty of simple 12v relays and a draw full of old DC power supplies so I chose to simply connect a power supply to the AC input which powers a relay to disconnect the battery when AC is available and switches the strobe/buzzer when AC is lost.
I did not want a constant buzzer sounding when AC was lost and while I could have created a nice toned buzzer using a small Arduino that could have cycled and even increased in tone the longer AC was lost, I decided to use a very simple looping timer relay that I can program the On and Off time which I set to provide a 2 second pulse every 20 seconds as an audible warning that AC power is lost. As a visual indicator I used an old security system strobe light and had planned to use a red light I had, but I broke it so I switched to a blue strobe I had on hand.
Both the strobe and buzzer have override switches to disable them separately in the event extended usage of the UPS is needed and you don’t want to be driven insane. Ideally I would have these auto-reset after AC restore and again, a little Arduino board could handle all of that functionality in a nice simple board, that may be an upgrade for the future.
I also installed the battery test relay which is a 7 day, 240v timer relay with 16 programmable timers. I am using just 1 timer to switch on/off the AC relay to disconnect AC for a 30 minute battery test each day.
I did not add a solar charging feature as currently it is just not worth the hassle. As part of the upgrade I completely redid all the AC input wiring and had to replace the main AC input switch as I had soldered wires to the previous switch and resoldering wires had caused the switch to slightly melp which made the actual switching feel mushy. It still worked, I just had no confidence for safety so removed and replaced the whole thing as this isn’t something I want to take chances with.
Another project completed, onto the next…!
We have sent a 6-digit verification code to your email. Please enter it below to continue.